Thursday, December 16, 2010

Cornmeal scones


These scones are from the Moosewood Cooks at Home cookbook with some adjustments. I have substituted the some of the unbleached flour for whole wheat flour, and I add more cornmeal. Occasionally I use rice milk in place of cow milk; presumably you could use soy milk in its stead, but I don’t use soy. Why not? I discovered some rather unsavory things about soy when I discovered that my oldest son had an allergy to it—an allergy that rather shaped our lives for a few years. He spent his preschool and first two years of elementary school fighting off respiratory infections and battling asthma. Once I figured out that soy was the main trigger for him, I was able to eliminate it altogether and his health dramatically improved. Since then, I’ve also eliminated it in my own diet, when I began to notice certain effects (do I dare talk about perimenopause in a blog about baking? Yeah….maybe not.) AND I found out how much farmland is devoted to the soy monoculture AND that Monsanto Corp. controls most of the soy production in this country and that it is not produced in a terribly responsible fashion. But, as I say to my students, don’t believe anything I tell you--find out for yourself.

So those scones. Fast, delicious and versatile. The original version is sweet, but not sweet enough, so I have added sugar. I make a savory version in which I eliminate the brown sugar and add about 1/2 cup shredded sharp cheddar cheese (packed) and a teaspoon of dried basil (or herb of your choice).
These make a great breakfast and are good for lunch as well. I do advance planning by measuring and combining the dry ingredients at night and setting up the wet ingredients in the fridge. In the a.m. I turn on the oven, microwave the butter, etc., mix it up and pop it all in the oven. Very little time and effort but a lot to show for it.


Cornmeal scones

Note: for a vegan version of this recipe, simply replace the butter with canola, sunflower or safflower oil; the milk with soy or rice milk. They will be slightly less rich, but still delicious and satisfying.

1/4 cup butter

1/2 cup milk or cream

2-3 T brown sugar

1/2 cup cornmeal fine grind

1 T coarse or medium grind cornmeal

1/2 cup whole wheat flour

1 cup unbleached flour

1/4 tsp salt

1 tsp baking powder

1/4 cup currants or raisins or dried cranberries (optional)

In a medium-sized bowl, combine all the dry ingredients EXCEPT the brown sugar. I melt the butter with the milk then add the brown sugar to the liquid and combine thoroughly. Add the liquid to the dry ingredients and stir until combined, being careful not to overmix. Fold in any dried fruit at this point.

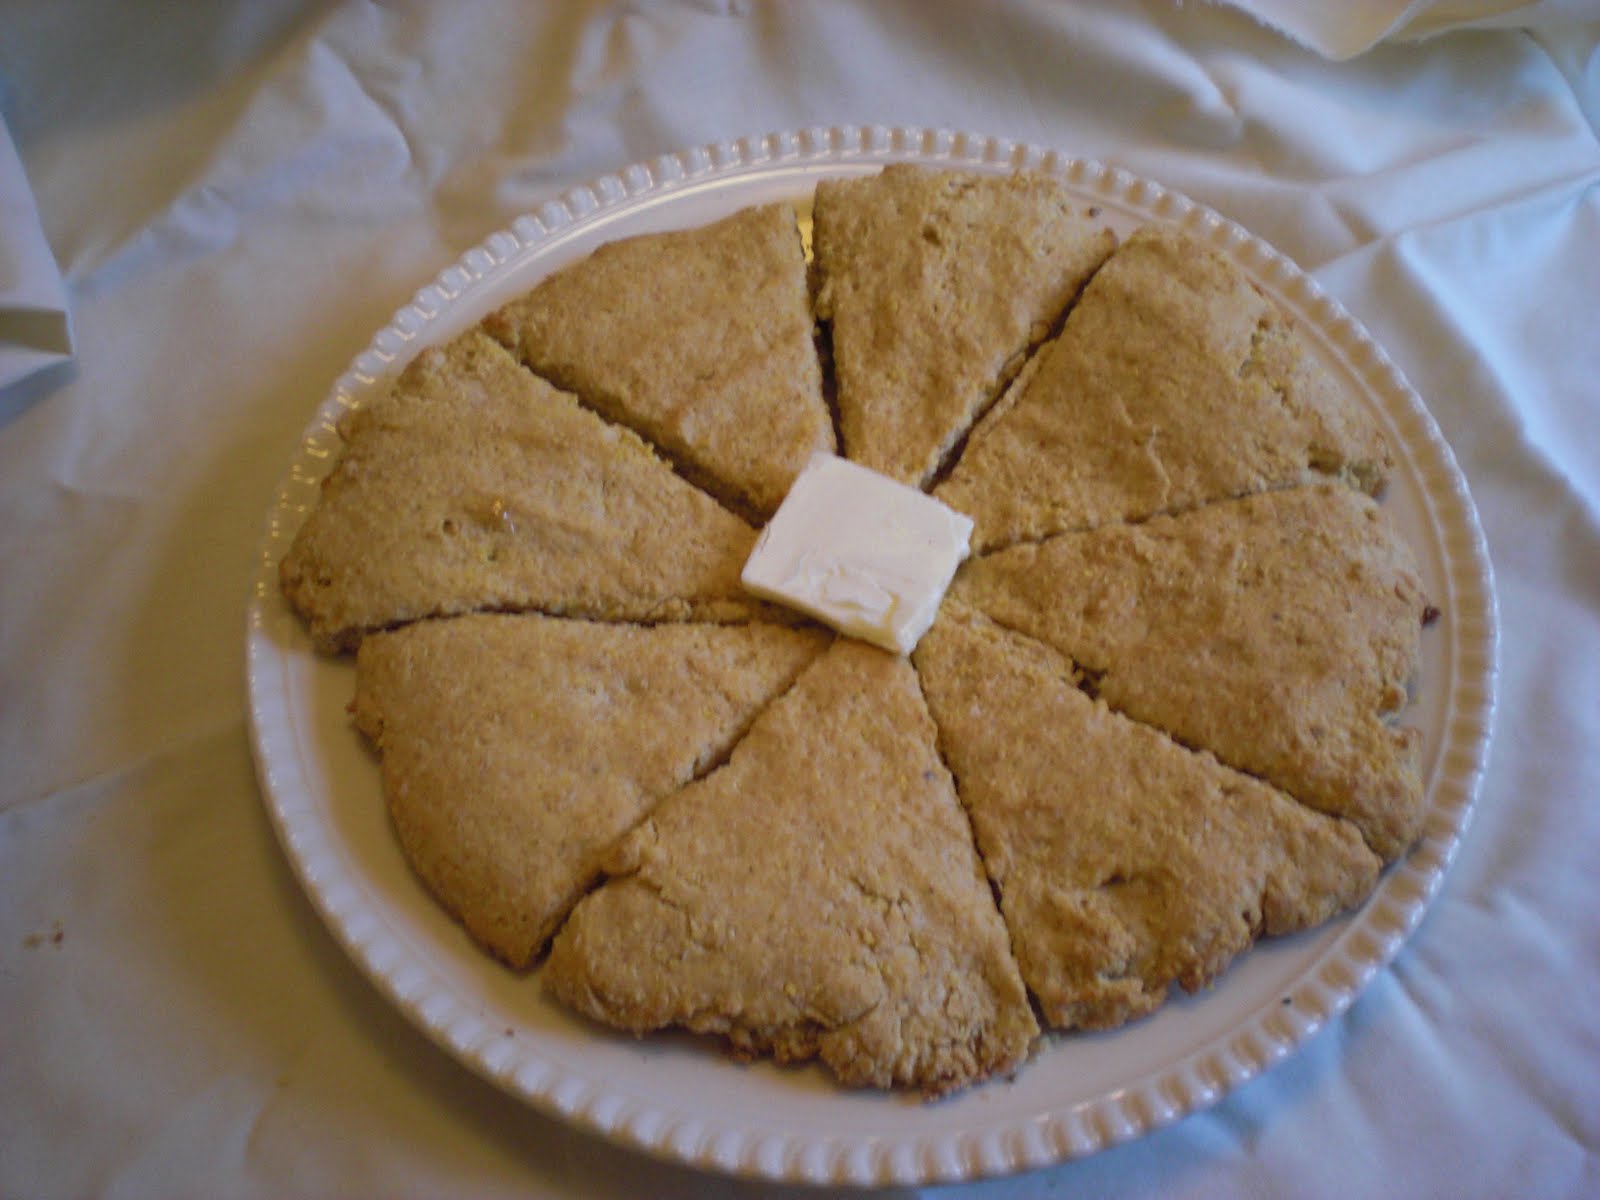
Press the dough into a circle about 9 inches across directly onto a baking sheet. Cut the circle into eights, slightly separating each wedge. Bake until very lightly browned at 375 degrees for 15-20 minutes.

For the savory version, add the herbs and the grated cheese with the dry ingredients. Proceed with the remainder of the steps.

Eat while still warm. These are best the day they are made.

Gingerbread cookies


This recipe, for soft gingerbread boys and girls, originates from The Betty Crocker Cookbook circa 1958 and they have been a staple for the holidays in my family since I was a baby; I started making them as a pre-teen. They served as place cards for Christmas dinner at my parents' house for a long time. After giving them a base of white buttercream frosting, I would write a name on each in green or red frosting. I still make them for my Aunt Mary and Uncle Hall in California, who spent every Christmas with us when I still lived out there; I put those names on, pack them up in plastic and bubble wrap and off they go. My Aunt and Uncle tell me that they arrive in good shape every year.

I now make them with some whole wheat flour. I used butter or margarine in the past but I've found that expeller-pressed safflower or sunflower oil make a cookie that is even more tender. I do not use margarine any more, nor do I use Crisco at all for food, though it can work as a heavy-duty moisturizer. Any icing you like will work well, but my relatives insist on a buttercream, which is more difficult for intricate decorating, but always tastes delicious. These cookies are wonderful plain as well. The dough can stay in the freezer for up to a week, but no longer.


Gingerbread cookies, aka "Gingies"


1/3 cup shortening/butter/veg oil

1 cup brown sugar

1 1/2 cup molasses

2/3 cup cold water

7 cups flour (I use up to 2 cups whole wheat)

2 tsp baking soda

1 1/2 tsp each ginger, cinnamon, cloves

1 tsp allspice


Sift all dry ingredients together.
In a large bowl, mix brown sugar with oil; add the molasses and stir until completely combined. Pour in water and mix until smooth and combined. Stir in the dry ingredients and combine thoroughly, but don't overwork the dough. Chill dough completely. It can just stay in the bowl if you are planning on using it the same day. This makes quite a few cookies so you might consider freezing half the dough if you aren't going to use it all within a day or two. It is best when the dough is very fresh.


Roll dough out thick (1/2'') on lightly floured surface and cut out shapes. These don't have to be gingerbread men; these work well as large cookies of any shape. Bake far apart on lightly greased baking sheet or parchment. 350 degrees for 15 minutes or until set. Don't let these get overly brown; that means they are over done! Cool completely before icing, but don't let that stop you from trying them while still warm.

Thursday, December 9, 2010

Rye Bread and Emily Dickinson


This fall I threw my hat into the ring and entered the baking contest at the Dixie Classic Fair of North Carolina. I entered two categories: "Oatmeal cookies, unfilled" and "Loafbread, Other" an intriguingly vague category. Basically this means anything other than white bread or cornbread, both of which have their own categories (naturally). I made a dark rye, more properly termed a black bread or "Russian" rye.


Participating in this subculture of American culinary competition felt anthropologic. Baffled and amused by the entry process, I covered cardboard with foil for each item, and attached my entry tags (which came in the mail after I signed up online) just so. What is the "right-hand front corner" of a rectangle with no distinguishing features? Why does using plastic wrap result in disqualification? As I carried my entries to the fairgrounds, it was fascinating to see the many women and a few men coming from various parts of this corner of NC bringing in their best baking. I am a lightweight, as it turns out. There were returning bakers, some of whom brought more than a dozen items (and in one case, more than twenty) for competition. I was also interested to see just what the all those items listed on the entry forms actually were. There are fourteen cookie categories alone, including one for "Pecan Fingers"; there are even more cake categories, going to the unneccesarily specific, like "Prune cake, glazed" and "Pineapple Upside-Down Cake" and the simply unneccesary "Fried Fruit Pies." Tube cakes are their own category, with thirteen subdivisions, including both sour cream and cream cheese, chocolate "un-iced" (why?) the mysterious "Five-Flavor" and "other". Why so many categories? Maybe it is the "everyone is a winner" philosophy. It didn't all get spread around, though. Seasoned competitors took home multiple prizes, with one homemaker taking home sixteen ribbons!

My cookies did not place, to my disappointment, but the rye bread took third place in its category. A little white ribbon was given to me, along with a check for six dollars from the city of Winston-Salem. Not bragging rights, but no disgrace, either. I'm gearing up for next year, much to the amusement of some of my friends. I must note here that Emily Dickinson was a passionate home baker and that she, too, participated in a baking competition, entering her "Indian and rye" at the Amherst Cattle Show of 1856. Her bread took second place. It is noted that her sister was one of the judges.

For the prize-winning bread (ha) I leaned on, once again, Beth Hensperger's Bread, changing up the recipe only slightly. I have found that it needs some extra moisture in the dry weather of fall and winter, when I typically make this. I also substitute vegetable oil for butter. I have slightly switched the order of operations as well, combining the dry ingredients before the rest, as I prefer to do with most recipes.

This bread makes a fabulous base for sandwiches; I like it with tuna salad, or turkey with mustard. It is exceptional when slathered with cream cheese and consumed with ale and is a provocative base for a berry preserve as well. My husband likes it as a bedtime snack, with butter and a glass of bourbon. You call it.


Black Russian Bread


2T yeast

1/2 cup warm water

2 cups water

1/4 cups molasses (I use a dark or blackstrap molasses)

1/4 cup vegetable oil

1/4 cup apple cider vinegar

1 ounce dark, unsweetened chocolate (good quality-I like Scharffen Berger, which contains no soy lecithin)

1 cup whole wheat flour

3 cups medium rye flour

2 1/2 cups unbleached all-purpose flour

1 cup bran

2 T caraway seeds

1 tsp fennel seeds

1 T salt

1 T espresso or instant coffee powder


Steps

1. Combine whole wheat, rye and unbleached flour in a large bowl and set aside.

2. Combine yeast and the warm water with a pinch of sugar; stir to dissolve. Let sit until foamy (5-10 mins).

3. Heat 2 cups water with chocolate, molasses, vinegar and oil until chocolate is melted. Set aside.

4. In a very large mixing bowl combine the bran, seeds, coffee powder, and 2 cups of flour mixture. Using a mixer at low speed, add the yeast and chocolate mixtures. Mix until smooth and then beat at medium speed for 3 minutes.

5. At low speed, continue adding the flour mixture about 1/2 cup at a time, until the dough begins to clear the sides of the bowl. It will still be sticky, but take it out and begin kneading in the remaining dough on a lightly floured surface. It will be "springy yet dense" according to Hensperger, though I often knead a bit past this point. Don't worry if you still have some leftover flour; you needn't use every bit. Form into a ball and place in greased bowl. Cover with plastic wrap or damp towel and let rise until dough has doubled. This will be about 2 hours, maybe a bit less.


6. When dough has doubled, remove from bowl and gently deflate. On a lightly floured surface, divide in half and form into 2 rounds. Place seam side down on a greased or parchment lined baking sheet that has been sprinkled with cornmeal and caraway seeds. Cover loosely with plastic wrap and let rise until doubled in size and puffy. This will take 40-60 minutes. Preheat the oven while you are waiting. Be sure to catch the dough at its most puffy; wait too long and it will begin to deflate! Slash the top a couple of times with a very sharp knife-an X is nice. This is both decorative and functional-it keeps the dough rising evenly in the oven.


7. Bake at 350 degrees for 45-55 minutes, until nicely browned. Cool completely before cutting into the loaves. Share with people you love.